How to emulate real load behavior?
We can configure the load behavior for a manual scenario in the Scenario Schedule pane of the Controller window. The Scenario Schedule pane is divided into three sections:
Schedule Definition area,
Actions grid
Interactive Schedule graph
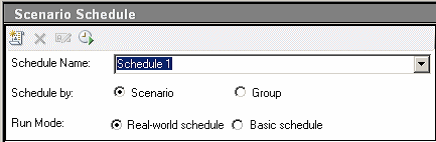
Step 1: Select schedule type and run mode.
In the Schedule Definition area, ensure that Schedule by: Scenario and Run
Mode: Real-world schedule are selected.
Step 2: Set the scheduled action definitions.
You can set the Start Vusers, Duration, and Stop Vusers actions for the scenario schedules from either the Actions grid, or by manipulating the Interactive Schedule graph. When you set the definitions from the graph, the Actions grid properties adjust accordingly.
You will now set the definitions so that the Actions grid will look as below.

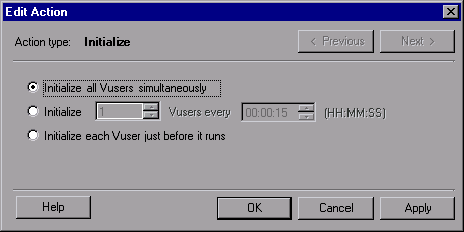
a. Set up the Vuser Initialization.
Initialization means preparing the Vusers and the load generators for a load test run by running the vuser_init action in the script.
Double-click Initialize in the Action grid. The Edit Action dialog box opens displaying the Initialize action. Select Initialize all Vusers simultaneously.
b. Specify a gradual start (from the Schedule Actions grid).
Starting Vusers at intervals allows you to examine the gradual increase of Vuser load on the application under test over time, and helps you pinpoint exactly when the system response time slows down.
Double-click Start Vusers in the Action grid. The Edit Action dialog box opens displaying the Start Vusers action.
In the Start X Vusers box, enter 8 Vusers and select the second option—
Start 2 Vusers every 00:00:30 (30 seconds).

c. Schedule the duration (from the Interactive Schedule Graph).
You specify a duration to make sure that the Vusers continue performing the schedule action for a specific period so you can measure continuous load on the server. If you set a duration, the script will run for as many iterations as necessary during that period, disregarding the number of iterations set in the script’s run-time settings.
Make sure that the Interactive Schedule Graph is in Edit mode by clicking the Edit Mode button in the Interactive Schedule Graph toolbar.
In the Actions grid, click Duration or click the horizontal line in the graph which represents Duration. The line is highlighted and a dot and a diamond are displayed at its endpoints. Drag the diamond shaped endpoint to the right until the time in brackets reads 00:11:30. You have just set the Vusers to run for a duration of 10 minutes.

Note: If the Legend is displayed in front of the diamond, click the Hide Legend button to display the diamond.
d. Schedule a gradual closure (from the Schedule Actions grid).
Gradually stopping Vusers is recommended to help detect memory leaks and check system recovery, after the application has reached a threshold. Double-click Stop Vusers in the Actions grid. The Edit Action dialog box opens displaying the Stop Vusers action. Select the second option and enter the following values—Stop 2 Vusers every 00:00:30 (30 seconds)

| About Load Runner | Creating scripts in Load Runner | Load Runner scenario | LR Analysis | Performance Tuning | Performance Testing | LR Errors | Interview Question | Load Runner Tool | Correlation Practice | Site Map |