Advanced Goal-Oriented Scenario
Which goal type should I use?
LoadRunner provides you with five different types of goals in a goaloriented scenario: the number of concurrent Vusers, the number of hits per second, the number of transactions per second, the number of pages per minute, or the transaction response time that you want your scenario to reach.
➤ If you know the total number of Vusers that can run your various business processes, you can use a Vusers goal type.
➤ If you know the strength of your server, you can use a Hits per Second, Pages per Minute, or Transactions per Second goal type.
➤ If you know the desired response time for completing a transaction, you can use a Transaction Response Time goal type. For example, if you do not want a customer to wait more than five seconds to log in to your e-commerce site, specify a maximum acceptable transaction response time of five seconds, and see how many actual Vusers can be served.
How do I create a goal-oriented scenario?
To emulate a real-life system with a mix of user profiles, you can assign several scripts to the scenario and assign a percentage of the load between them. You should set the percentage according to the expected load.
1 Create a new scenario.
Select File > New, or click New, to open the New Scenario dialog box.

2 Select the scenario type.
Select Goal-Oriented Scenario.
3 Select a script.
Select basic_script from the Available Scripts list, and click the Add button. The script is displayed in the Scripts in Scenario pane.
Click OK. The LoadRunner Controller Design view opens displaying the basic_script in the Script Name column.
The Controller window at a glance (goal-oriented scenario)
The Controller window (goal-oriented) Design view is divided into three primary sections:
➤ Scenario Scripts pane
➤ Service Level Agreement pane
➤ Scenario Goal pane
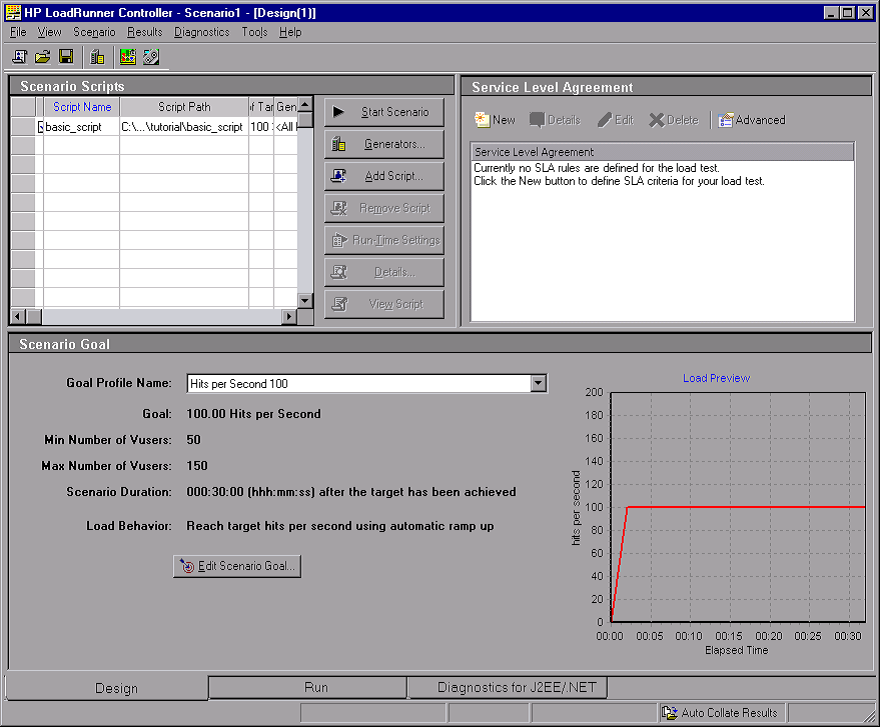
Scenario Scripts pane: In this pane, you determine the Vuser scripts, their paths, the percentage of the total target assigned to each script, and the load generators. You configure the scenario settings from here.
Service Level Agreement pane. When you design a load test scenario, you can define goals or Service Level Agreements (SLAs) for the performance metrics. When you run the scenario, LoadRunner gathers and stores performance-related data. When you analyze the run, Analysis compares this data against the SLAs and determines SLA statuses for the defined measurements.
Scenario Goal pane : In the lower pane, you can see your testing goal, the number of users that you want to use to reach that goal, the scenario duration, and load behavior. You define the goal settings from the Edit Scenario Goal dialog box.
How do I define the goal?
1 Open the Edit Scenario Goal dialog box.
Click the Edit Scenario Goal button or select Scenario > Goal Definition. The Edit Scenario Goal dialog box opens.
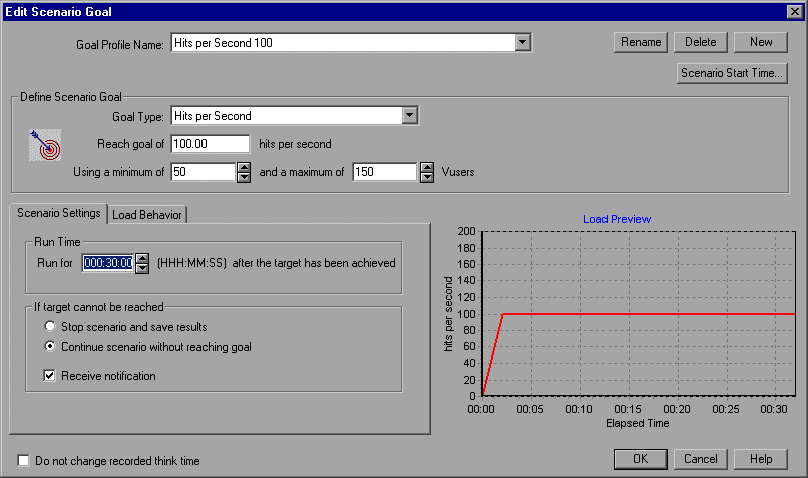
2 Specify a logical name for the Goal Profile
Click New, type the new goal profile name (for example: Hits per Second 3) in the New Goal Profile dialog box, and click OK.
The new goal profile name appears in the selector.
3 Define the scenario goal.
a In the Goal Type box, select Hits per Second.
b In the Reach Goal of X Hits per Second box, enter 3.
c Set the minimum-maximum range of Vusers for LoadRunner to run.
Enter 5 as the minimum and 10 as the maximum number of Vusers. This corresponds with the minimum-maximum range of travel agents that you want to create hits on the server simultaneously.
| About Load Runner | Creating scripts in Load Runner | Load Runner scenario | LR Analysis | Performance Tuning | Performance Testing | LR Errors | Interview Question | Load Runner Tool | Correlation Practice | Site Map |